Welcome, and thanks for being here! Below is a brief summary of the episode and some of my thoughts on starting this podcast and what I would like it to become.
Who Am I?
I’m an all around tinkerer! I like to make, create, attempt and do traditional skills! I started with a fascination for nature and learning wilderness survival and primitive living skills then followed my passions into more refined artisan crafts where I essentially learned that I, quite frankly, just like to build things with my hands! I like to know how things work, I like to learn the old ways, and I crave a feeling of self dependence…. That I need to know that I have the skills necessary to take care of myself and produce what I need. Does that resonate with you?
I’ve always identified as both a primitive technologist and a homesteader and considered them to be in different camps, but have come to realize they are simply two different approaches to the same thing. Becoming more self- reliant and developing a greater connection with the natural world.
Why Start a Podcast?
Good question!
Primarily my reason
to start the podcast is to become more involved in the traditional
skills community. I’ve sat in the background too long and just
absorbed information, now I want to share and teach. It’s time to
give back. Plus it gives me a great opportunity to connect with folks
and learn new skills as well! I’ve started listening to podcasts
over the last couple years while I work on things, and I love the
format– I love being able to learn about something, get inspired and
stimulate my mind in a way that doesn’t require my full attention.
What Types of Skills
Are We Going to Cover?
Anything from the stone age to the artisan craft period! I’m curious about it all!
Mainly, I want to
focus on skills from before things became heavily industrialized and
mechanized. Back when products were still made by hand, and many
people still made them for themselves. I’m interested in covering
traditional skills from all over the world– though, if I’m
perfectly frank, I know more about the European history and crafts,
so they will likely be covered most thoroughly. As I mentioned
before, I’m a primitive living skills enthusiast and admitted
nature lover. . . so I also tend to have a bias towards skills that
keep me outdoors!
The focus will be on
both ‘hard’ crafts/skills (ones where you create an
object/product) and ‘soft’ ones where you learn a skillset that
doesn’t necessarily produce quantifiable article – tracking,
navigation, plant identification, etc which are probably actually
harder skills to learn then the ones I just called ‘hard skills’.
What do I mean by “craft”? Well, first off I’m not talking about artsy decorations, I’m talking about making something useful with your hands. Practical, functional items. Developing the skill of creating, and learning to be more dexterous and hands on with the things around us to make what we need. Making what you need with what you have.
The Goal with the
Podcast?
To get you making
things!
But seriously, I
want this to be a podcast that you listen to and are then inspired
and motivated to try something new. One that exposes you to a craft
or skill with enough detail that you can then go out and make
whatever it is we discuss that week. In short, I want to inspire,
educate, and spread traditional skills, crafts, and knowledge.
And, hopefully along the way you’ll began appreciating the articles in your life more, it’s amazing how much more something that is handcrafted means. . . Especially when you made it yourself!
What Do You Do With Your Time?
Utilize your
downtime! When away from work, try to learn a new skill (traditional
or not) and develop yourself instead of spending your time watching a
movie. I think we spend too much time in life in front of a screen
relaxing (myself included) and you’ll be happier if you give up
some digital time and instead relax by learning and trying something
new… Preferably something old-fashioned and hands on that will help
us become more self-reliant and sustainable!
So I guess the question is: what are you working on? What are you creating and producing in your life?
Do you ever feel like you’re the only person out there who enjoys learning traditional skills? I do. Seems like a pretty frequent thing actually. In today’s day and age my passions and interests are definitely a little odd. . . Who wants to learn how to do something so outdated and unnecessary?
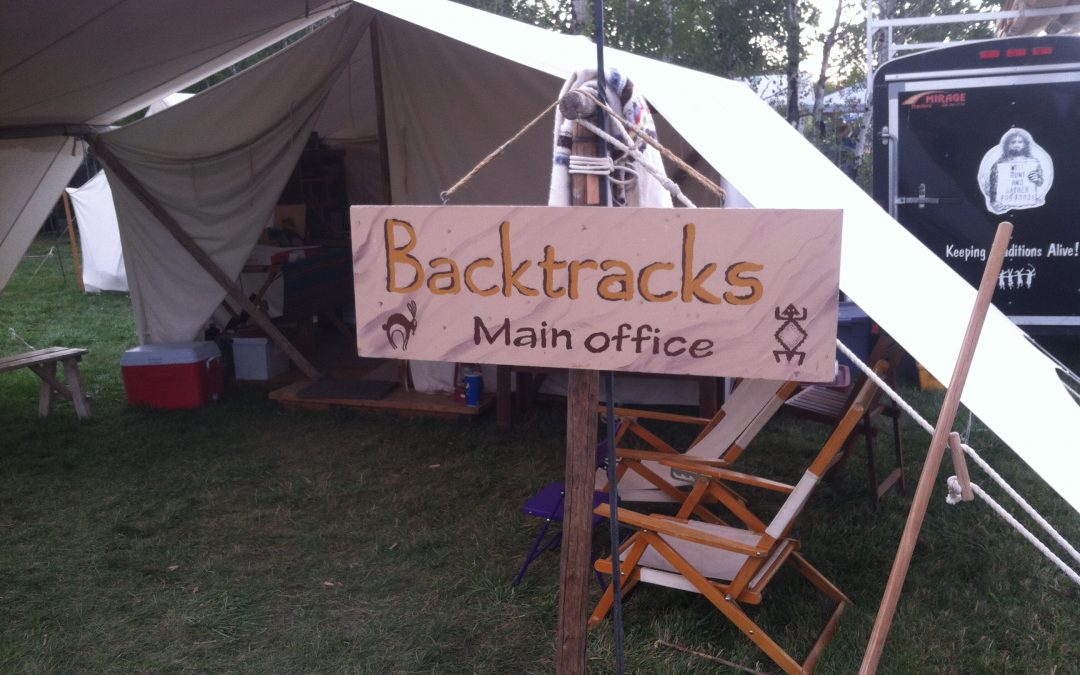
Me for starters, but sometimes it would be nice to connect with other people who have similar interests. The first time I went to Tracker School was a revelation to me, I had never been to a gathering or school before then and had somehow existed under the impression that– even though people were writing the books I read to teach myself things– I was the only person in the world who had an interest in learning and practicing these skills. Definitely not true! It bears reminding every now and then though, hence this months favorite– Rabbitstick Rendezvous.
Rabbitstick is a week long primitive skills gathering held in September only a couple hours from my house. What’s nice about this gathering (and multiple others across the country), and what sets it apart from period reenactment, is that it has a focus on teaching and learning, there are multiple classes every day all week long, giving you a chance to learn quite a bit. Rabbitstick is the oldest primitive skills gathering and I grew up reading about it in various books and have wanted to attend for the last 15 years or so….. but somehow have never made it up. Time to change that this year! For me, it’s been a few years since I took the time to go to a school or connect with others that are interested in traditional skills so it was a much needed reset to remind myself that there are other like minded folks out there. I could only get away for a day and not the entire week, but I had a great time nonetheless and highly encourage people to consider going to a gathering! Get out and spend time learning and connecting with other people who have similar interests!
And I’m in the middle of making a batch of broadheads.
A wee bit late you might say. True, I will readily admit that this project got delayed a little longer than it should have. I would’ve liked to have these ready months ago. Actually, my original plan was to make an entire new set-up for this season: bow, arrows, broadheads, quiver, etc. Ambitious yes, but last winter it seemed like a reasonable goal.
Goals always seem more reasonable before you actually start them.
Alas, that goal didn’t last long in the
face of normal life. . . as time went on my desire dimmed and I
settled for at least wanting to make a new batch of arrows! And then
before I knew it archery season was on the verge of starting! Which
brings us back to me sitting in the garage the day before the season
opens working on some arrows. Actually, I started these arrows two
days ago, but as I only get limited time to work on them it doesn’t
look like I’ll finish up with tons of time to spare. Realistically, I
likely won’t even end up using them this year, having not had time to
adequately practice with them. But it’s been fun having a project
again!
All I’ve ever used is homemade broadheads, maybe that says something about me, maybe not. Even most traditional archers seem to use commercial broadheads. . . And arrows. . . And bows for that matter. Why? Beats me, they miss out on all the fun of making their own gear! That’s half the reason I’m a bow hunter! I’ve made my own bows for years, assembled my own arrows (but not made the wood shafts myself, something I remedied this time around), and attached my homemade broadheads. I’ve always used tie-on broadheads though, and I felt like it was about time I tried something a little more…. refined.
Not about to actually buy them
though.
So what style did I want to try? Well, it seems like there is a number of people who do DIY broadheads by simply sawing a slot in a field point and inserting the blade, doable but sawing a slot into the point centered seemed unnecessarily difficult for this time around. In addition, that sort of seemed like starting with a half baked cake. So I opted to essentially copy Saxton Pope’s method from his classic 1929 book Hunting with the Bow and Arrow, meaning that I’m going to create my own glue-on broadhead ferrule from metal tubing as well as the blade to mount in it.
Designing Your Broadheads
First thing you need to decide is what style of broadhead you want. Are you looking for an old english style with rounded shoulders? Oval shape? Simple triangle? Barbed ones? Personally, after having made all my previous broadheads into a simple triangle shape I wanted to try something a little different. And, after having some experience with broadheads in a buckskin quiver, I wanted ones without back corners that would snag as I was drawing them out of the quiver (less of a concern if using a hard quiver). Which means either round the corners off, or cut them on an angle– I elected for an angled shape. Though I really like the elegant look of a rounded raindrop shape. . .
Secondly, what do you want the overall dimensions of your finished broadhead to be? After thumbing through my collection of archery books, I came to the conclusion that most of them suggested a head between 1 ½ and 2 ½ inches in length and under 1-1/2 inches in width. I drew heads in a variety of different dimensions and then chose the one that I liked best–where the blade initially started as a triangle that is 2 inches long and 1 1/4 inches wide and finished with a cutting edge that is about 1 13/16 long and 1 1/8 wide (narrower&shorter because I removed the back shoulders so they angled forward).
Choosing Materials
You’ll need a few things for the style of head we’re making:
Steel— If, you’re doing this at home with a minimum of equipment (like me) I would suggest getting high carbon steel. Stainless would be nice…. but difficult to appropriately heat treat at home. I used this 1095 high carbon spring steel (actually, that’s a lie. I used that same product, but it was 3 inch wide material, not 2 inch. That doesn’t seem to be available on their website at the moment though. You’d need a wider one if you wanted longer broadheads, I actually would’ve preferred the 2 inch if that was available when I bought mine since I had to cut them to 2 inch blades anyway….). Expensive, yes, but it came with enough for me to make a LOT of broadheads. Way more then I’ll use for this batch. You can also scrounge your material if you want, the broadheads I’ve made in the past were made from recycling broken bandsaw blades from the woodshop I used to work at (large ones from re-sawing lumber). A little bit thin of a material, but it was serviceable. I know Jay Massey in The Bowyers Craft says he uses 2 ½ inch wide steel railroad banding, not sure if that’s still in use anywhere but if you have a rail line in use near you it may be worth investigating. Essentially it would be the same thing as the spring steel I bought.
Ferrule material— You’ll need to round up some tubing in 3/8 diameter to serve as your ferrule– actually, tubing size will depend on your arrow shaft diameter, 3/8 is what I needed. 11/32 and 5/16 are also common arrow sizes, though I think you’ll likely have an easier time locating 3/8 tubing. You’ll just have to file the base of the ferrule so it comes flush to your arrow shaft). Pope says he uses .22 gauge steel or brass tubing… No idea where he locates such stuff as I had a bugger of a time finding any tubing in 3/8 of an inch, let alone something that thin. Finally located some aluminum A/C tubing from O’Reilly Auto Parts to use. Wish it was steel, but that wasn’t obtainable around here. Anyone else know where to get thin walled steel tubing in 3/8 inch for a reasonable price? I would love to have a source. We’ll see how the aluminum holds up. Needless to say, since it was thicker walled, it took more time to fit to the arrow shaft then it would have otherwise.
** UPDATE: I actually found a source of thinner walled material online after doing some searching, it was surprisingly hard to find online as well. Apparently tubing this thin doesn’t have many commercial uses? Either way, I have not tested this (though I likely will for my next batch of broadheads) but you can get 3/8 tubing in steel here and brass here. If you shoot arrows that aren’t 3/8 inch, they also have quite a few other sizes. Plus, it’s cheaper! From what I’ve been able to tell, the 22 gauge material Pope used would be roughly 0.03 inches thick. Get something in that ballpark. I’m very tempted by the brass….. I think that would make a really nice looking broadhead!
Pins— You’ll need something to pin your broadhead together, in my case I used one inch long #16 brad nails. They came in a pack of 50 from the hardware store for about 3 bucks. You’ll also need a drill bit that matches the diameter of the pin you use, already having a small drill bit I spent the time looking for a nail that matched it in size (a #16 nail is, coincidentally, 1/16 of an inch in diameter).
Epoxy— Actually I used JB Weld. Pope pinned his together and then soldered the seam between the ferrule and the blade, not having a soldering iron I elected to glue the blade to the ferrule at the same time I pinned them together. You could also braze it if you have the equipment. Either soldering or brazing would likely make a prettier looking finished broadhead if done well.
Annealing the Steel
To be able to cut your blade steel effectively you’ll need to anneal it (make it softer) by bringing it up to a glowing red temperature and then letting it slowly cool. This will make it easier to work with. But gave me more work in the long run since I then had to heat treat and temper the blades. Up to you whether you do it. I actually thought I had bought the steel that came annealed and was surprised when I opened the package to see the blue color it had been tempered to, which, ironically, was about the same temperature I tempered mine to in the long run anyways. If you decide not to mess with annealing, heat treating and tempering, you need to be extra careful while working the metal to not let it heat up noticeably. If it burns (you’ll see a discoloration in the steel) it won’t hold an edge as well and will get dull faster.
My honest recommendation? If you can avoid having to anneal, temper and heat treat do it. You’ll save yourself quite a bit of hassle– though it’s good to know how anyways. So, if you can find a way to cut the steel while it’s still hard do so (yes, this will take extra long…. though you’ll make up for it by being able to skip the heat treating stage). A hacksaw will cut the steel as it comes, but I hesitate to tell you that because it is hard enough that you will likely ruin a few blades.
Laying out the Pattern
I made my pattern a little large in all directions to account for smoothing up the edges and making it all neat. Starting at one long edge, measure up the length of your broadheads and mark a line parallel to that edge (I ended up marking a line that was 2 1/16 inches in from the edge). Note: this step will be unnecessary if you bought blade material that was 2 inches wide to begin with. I ran a sharp staple down the edge of my ruler to scribe the mark in. Now, on one side measure the width of your broadhead design and make a mark, repeat down that entire side making a mark to delineate the width of every broadhead. On the other side, measure half the broadhead width in from the end and make a mark, this will mark the tip of each blade and keep it centered. After that, make a mark at every broadhead width from that initial mark– they should all lie midway between the marks on the other edge. Using a straight edge, connect your marks with scribe lines so that it forms a series of triangles. Some will be right side up, others inverted (you’ll get broadheads off both sides). Pictures may make more sense than words here.
Cutting out the Broadheads
After the broadheads are marked out on your steel, you need to cut them out. I personally used a jewler’s saw, it was the most convenient tool I had for the job. If you have metal shears, those would work dandy as well, I would just plan on cutting the pattern a little extra large to account for the curl on the edge that you’ll need to remove if you use those. A normal hacksaw would also work great– yes, this takes some time. Clamp it to a work bench, table, etc as you do this to prevent it from moving around and shift it often so you are working near the support that way you don’t bend the steel. Once you have your pieces cut out, clean up the edges using a grinder or a file. Just make sure the edge gets flattened and you remove all the rough saw marks.
If you want to change the shape from a simple triangle now is the time to mark that off. For me, I used a ruler and my sharp staple again to create another set of parallel lines 3/16 inch up from the base and marked where that intersected the edge of the broadhead. I then found the center point of each base, marked out 3/8 of an inch around it (3/16 either side) and drew a line from those points to the marks that were 3/16 inch up. Thus removing the corners of the triangle. Instead of using a saw to remove the back corners on my broadheads I ground them off at this point, carefully taking them down to the mark I had previously scribed. Which brings something up, when grinding metal you need to make sure it doesn’t overheat. It’s not good for the steel to burn. Keep some water handy and dunk it frequently while grinding.
You’ll now need to sharpen your broadheads (don’t take it to a razor edge, just take the edge down to give you less work after heat treating). Shape the edge down to be noticeably there, but not sharp enough you’re worried about cutting yourself. I once again used a grinder– actually a belt sander, a grinder will work well enough if you’re careful though. If you don’t have one, use a file.
Making the Broadhead Ferrule
The broadhead ferrule is the part that slips over your arrow shaft and holds the broadhead blade in place. As mentioned previously, I used 3/8 inch aluminum automobile air conditioning line for mine. See what equivalent your local auto parts store has. Personally, I would have preferred it to be steel and to have a thinner wall (ie a larger interior diameter). Beggers can’t be choosers though and we need to work with the materials we have, though in this day and age with the internet I suppose I could have waited for something to be shipped in. ** See the above update if you want to order material online.
First decide how long of a ferrule you want: try not to leave the blade unsupported for more than about an inch at the tip, that will help prevent the blade from bending. I designed mine to come about an inch up onto my arrow shaft as well– if you take it too far back up I have read that it can exert pressure on the shaft where it isn’t as stiff, causing it to snap the shaft when it impacts something. Thus mine ended up finishing out somewhere in the neighborhood of 2 inches long– one inch on the blade, one up the arrow shaft..
In order to go from a straight tube to a ferrule that will hold a blade, you’ll need to pinch one end closed. Pope uses a hammer and flattens the end of the tube on an anvil, which would definitely work. I wanted to be a little more precise, so I put 1 ¼ inches of the end of the tube into a little vise on the end of my workbench and tightened it down (make sure you put it in perpendicular!). This flattened it completely and smoothly, and not only that, it kept the flattened section centered on the tube, something I’m not sure I would have done very well working by hand. Besides, not very many people have anvils anymore, I know quite a few with a vise. Large clamps would work as well, but would likely be more hassle keeping everything in position while tightening them down.
Once it’s flattened, measure out 1 inch and cut off the tubing. Now use a file to clean up the base of the tube and make it square. After that you’ll need to grind down the misshapen end to come to a nice rounded point on the end. I used a combination grinder and file for this work, grinder to remove material in a hurry, and files to smooth it out and make it look nice. You’ll likely have some really thin material on the side wall of the tube where the mashed part meets the round tubing. I used the tip of a knife to remove this down to thicker material that would give more support (kind of like reaming out the thin stuff bent in on the side). Keep it even on both sides.
Mounting the Ferrule on an Arrow
Showing how the shaft need to be filed to fit inside ferrule.
After the ferrules are made, it helps
to mount them on an arrow shaft before attaching the blade. To do
this, mark back the distance you wanted your ferrule to come on your
arrow shaft. Now take a large file and begin to file the end down to
a smaller diameter, coming right up to that line. This is where I
began wishing I had thinner ferrule material. It’ll take awhile, just
keep at it, rotating the shaft as you go so the broadhead will stay
centered on the shaft. Try the ferrule from time to time, you want it
to fit snug. Usually, mine would start fitting on the end and bind
part way down, so I would have to focus on tilting the file up a
little bit, thus removing more material higher up the shaft. Once
it’s on, rotate the shaft and ensure that the ferrule is tightly up
against the base that you filed into the shaft. Likely, you filed
unevenly and will need to fix that so it is tight all the way around.
Make it fit nice and snug.
Shaft tip is flattened to account for the constriction in the ferrule.
As you work on it, you may realize that the arrow isn’t going in all the way because the end of the tubing/ferrule is deformed as it bends down to hold the blade in place. You’ll need to flatten two sides of the tip of the shaft to accommodate for that and allow it to go in all the way. Decide now how you want your broadhead to sit in relation to the grain of the arrow shaft. Since my knocks sit cross grain, I also oriented the head to go across grain. Actually, I filed both sides a little too much so that I would have some wiggle room and be able to twist it and get everything to line up if I was a little off. This part doesn’t need to be precise.
Pinning the Blade to the Ferrule
After you have ferrule and blade
shaped, it’s time to pin them together. With the ferrule mounted on
an arrow shaft, insert a blade between the ends and push it all the
way back. Now adjust it until visually centered (since I only have
3/8 inch at the base, I lined my base up with the edges of the
ferrule and then just shifted the blade until the tip of it was in
line with the arrow shaft). Now clamp it in place. Rotate the arrow
shaft while looking down it and see if the tip continues to look like
it stays centered. Adjust as needed.
Once happy with how it looks, tighten your clamp fully to keep it securely in place. Chuck up the drill bit that matches your pin/nail diameter and drill a hole through the tip of the ferrule, blade, and other side of the ferrule. Support the back of it as you do this as you need to apply a decent amount of pressure to get through the steel and you don’t want to bend the ferrule if you can avoid it. That being said, it’s not a game ender if you do. I fixed my first one as I hadn’t thought about it ahead of time and bent the ferrule on the other side of the steel when I came popping through. Easiest is to just clamp it to a block of wood if you can fit a clamp in around everything or take the other one off and re-clamp it without anything shifting around. After drilling, mark the blade and ferrule so you know which way it went together and then remove the blade and clean up the edges of the holes with a file to smooth off the burr.
Heat Treating and Tempering
Heat treating is where you take the blade heat it to a cherry red and quickly quench it in water or oil. Essentially, heating steel up red hot changes the internal structure and if cooled rapidly it will retain that structure thereby enabling the blade to hold a sharper edge and dull less rapidly. This only works on steels that have a high carbon content. I used a MAPP torch to heat my blades, it doesn’t take much to heat the blade as it is such thin material, I’ve used a normal propane torch in the past. That being said, it is significantly easier and takes less time to bring things up to temperature if they are not exposed to air all around them– I held them in the entrance to my forge with a pair of pliers. You should at least build a little box/windscreen around them with some bricks, cinderblock, etc. Insulating firebricks would be superb if you have any, but you probably didn’t need me to tell you that if you do. You want something that will retain and reflect heat back onto the blade, firebricks are more insulative than normal bricks and don’t have the mass you’ll have to heat up that standard bricks do. They reflect the heat better instead of absorbing it, which means you can bring it up to temperature quicker, though it won’t retain the heat for as long. Regardless, heat your broadhead blade up to bright red and then dunk it in water. Try to put it in either edge first or tip first, avoid laying it down flat on top of the water. If one side cools quicker than the other it can warp your blade. I had three that warped, so I heated them up once more then took a ball peen hammer and pounded them flat before heating and tempering again. Later I found out two of them had developed a small crack from this process and had to be tossed out. Apparently they cooled too much while I pounded on them and I hit thin, cold, brittle steel and cracked them. . . This is one of the reasons I suggested that if you can find a way to cut the steel while it’s hard you should. If you didn’t anneal the steel, you can skip this whole section.
Heat treated blades will take an incredible edge…. but they’ll also be extremely brittle. Not desirable for something only 0.05 inches thick that will be launched at high speeds into an object! We’ll need to temper them. Tempering is the process of warming up your blade to a temperature that the molecules can become slightly more fluid and realign but not taking it as hot as heat treating. This essentially allows the grain in the steel to relax somewhat and become more flexible. (Yes, all you metalworkers out there, I know I simplified this whole process drastically and dumbed it down a lot.) The higher temperature you take your steel, the more it will flex and absorb shock without breaking. Like many things in life it’s a trade-off though, the higher you temper it to the less resistant to wear the blade will be and you’ll have to sharpen it more often. I usually take my knives to a light straw color since holding an edge is very important to me and I don’t abuse them. For my broadheads I took them to a medium blue color. You can do this with a propane torch as well and just watch the color change, or you can do what I did and just pop them in a 550 degree oven (Fahrenheit) for an hour. That will be about the temper you want.
After tempering, clean them up by
laying them flat on some sandpaper and quickly rubbing back and
forth. I used 220 grit for this. This will also show you if you have
an warping in your blades as they won’t lay flat and you’ll have some
of it that sands shiny and some that stays dull. Clean them up nice
and good and then you’re ready to mount them in the ferrule!
Warped blade….
Assembling the Broadhead
First clean off all your materials to
be sure they are free of dust, grease etc. I wiped mine down with
acetone: denatured alcohol would work as well, and I’ve used high
strength rubbing alcohol in the past… which is much better for your
health to be working with. I’m just not entirely sure if it cleans
well enough. Anyone know for sure? Let me know in the comments, that
would be helpful to know when assembling knife handles!
Everything ready for assembly.
Once all your parts are clean and dry, mount the ferrules onto arrow shafts again. Next mix up two equal parts of your epoxy (I used JB Weld here, though I’m guessing most high strength epoxies would be usable) and spread a little between the tips of the ferrules where the blade will go. Now quickly insert the blade shift it until the holes line up, tap your pin/nail through (you’ll need to use a hammer and support it on something again), and shift the blade until the tip lines up with the arrow shaft. Now clamp it in place and rotate it to ensure it is in plane with the arrow. If something got bent and is out of alignment hurry and straighten it and then set it aside to dry. You may want to wipe the blade down with vinegar or rubbing alcohol if you got epoxy all over it. I used a paper towel with some rubbing alcohol on it to gently clean up the seam between the blade and the ferrule.
After the epoxy has cured, clip off the nail a little above the ferrule and peen it down– Ie take a ball peen hammer and gently tap it to deform it down and secure the blade in place. You’ll need to support the underside on something solid and metal while you do this. Flip it back and forth and do both sides. Both sides should look like a rounded bump. Now take a file and smooth it off with the ferrule.
Attaching Broadheads to Arrows
To attach your homemade broadheads you’ll just glue them on like you would any commercial head. Take your head back off the shaft you had them on, smear a decent amount of glue down inside (don’t overdo it though, it doesn’t have anywhere to go and can make pushing your arrowhead on difficult if there is too much) and push back onto the shaft. Make sure you are aligning the flat tip on your arrow how it needs to be to fit inside the end of the ferrule. If it feels like it rebounds and gets pushed back off the shaft a little that means you used too much glue. Pull it on an off a few times to work some of the glue around and if that doesn’t work then you’ll need to remove some. Make sure the ferrule is sitting all the way back on the shaft and the tip of the broadhead is in alignment with the rest of the shaft and then set it aside to dry. Rewarding huh? Sure is a lot of work…… Makes you treasure them even more when you put the time in to make them yourself!
*UPDATE: I didn’t end up getting out the next day for the opening of the archery hunt, but I was out the following weekend and filled an elk tag…. Using my old tie-on broadheads. I just wasn’t comfortable using something new without having enough practice under my belt. Maybe next year though!
You might have expected this based on the fact I have a site and podcast devoted towards traditional skills and crafts but I’ll tell you anyway…. I love a good museum. To see the history and how people used to live is just amazing. Needless to say, I was looking for some examples of Shoshone (the tribe native to my area of the U.S.) work for a project that I was about to start and discovered that the Utah Museum of Natural History has an online, searchable, database (anthropology department available here). Not surprising in this day and age I guess. Still it was a wonderful discovery for me!
But that got me thinking. . . If the state museum has an online database, why wouldn’t one a little bigger? So I looked at one that I figured would be of more use to the majority of you. The Smithsonian National Museum of Natural History (link to the anthropology dept here). And their collection is MASSIVE!! Want to see examples of ancient copper knives before you make one? 66 results. Bone needle? 544 results. Bow?? 2842 results! If you can’t find examples here that give you ideas than I’m not sure you’ll ever be inspired. This contends with Youtube for the ability to capture your attention with serious time-drain capabilities. It’s just fascinating to see it all!
That being said, unfortunately, the entire catalog has not been photographed yet. Sometimes it will tell you something exists in their archives. . . but you don’t even get a description. Disappointing yes, but their collection is extensive enough that I think you can probably find an example or two to study regardless. So if you’re wanting to find some inspiration, or just want to check out cool stuff, go wander their archives for awhile!
I’m making a batch of arrows for the upcoming archery season– with
my own shafting from lumber.
Whoop-de-do you
might say, but for some reason I’ve always bought my arrow shafting
and just assembled them, something I intend to remedy this time
around! However, I know how important it is to have matching arrows.
. . which led me to making a spine tester. Another project to build
something that will assist in making something else!
What is Arrow Spine?
Spine is simply a
measurement of how much an arrow flexes. When you shoot your bow, the
arrow absorbs the energy from the string and flexes dramatically as
it launches from the bow. If it is the incorrect spine for your draw
weight your arrows will not recover as quickly and accurately as they
should. If your arrows are impacting the target on an angle (the back
is either to the left or right) you have arrows that are not spined
correctly for the bow you are shooting them from.
Traditionally, spine
is measured by bracing your arrow shaft exactly 26 inches apart and
suspending a 2 pound weight from the center. The distance that the
shaft deflects when the weight is placed on it will tell you your
arrow spine– you then match your spine to your bow draw weight.
There are several modifications to this principle that you can do to
get perfectly tuned arrows for your set-up, but in general, if you
get them close and have a matching set that are all similar that
should be good enough. Or at least that’s my opinion. That said,
I’m not a world class archer winning shooting competitions so I
might not be the person you want to listen to. Basic other principles
though: the further from centershot your bow is the lighter spine
arrow you’ll need since it will have to flex more to get back to a
straight line so if you have an extra wide handle maybe go down a
little to accommodate. This assumes you have a 28 inch draw length,
if you shoot significantly longer or shorter arrows you will need to
shoot a different spine– look up information on dynamic spine to
figure out how much, and to see a list of a couple other factors that
could change the arrow spine that works best for you.
Design and Materials
First off, don’t get hung up on trying to make yours exactly like mine. All you need is to suspend the arrow shaft 26 inches apart, you need a 2 lb weight to put in the middle, and you need a way to measure how much it has moved. How you do that is entirely up to you, this is simply how I made mine. It was inspired by this one over at poorfolkbows.com and if you want to see a few other testers people have made he has compiled sample pictures of a few on the next couple pages following that link. It’s a great resource to see a few different options.
As you’ll see, I built mine attached to the side of the shelf that holds the scrap wood in my garage. Why? Good question. Mainly because it was convenient and right about the height that I wanted plus I was too lazy to fight past the junk in my garage to get to the wall. You could attach it directly to the wall or build a small stand for it as well. I almost suspended mine from the bottom of the shelf that is above my workbench as well…. And may move it there next time I want to use it. We’ll see.
I modified one eye screw so I could hook it over the arrow shaft
I used eye screws to balance my shafting on (or run through in this case)– a 5 pack was about $3 at the hardware store. My 2 lb weight? An empty glass salsa jar filled with miscellaneous items: bag of copper powder, allen wrench set, chunk of antler, extra eye screw, etc. The only downside to this arrangement was that the salsa jar is somewhat taller than would be ideal if you were to build a tester that doesn’t have tons of room under it for the jar to sit. Of note would be the fact that I took one of my eye screws and cut out the side of it so it could hook over the arrow shaft and then screwed it into the center of the lid. You need to make sure that your method of hooking the weight onto the shaft is accounted for when weighing. To measure deflection I used a digital caliper because I already had one. Total cost for this project: $3 for the eye screws. Time: maybe 15 minutes (to set it up, longer to actually test all my shafts). Well worth it to ensure I have a matching set of arrows.
Making the Spine Tester
To begin with, I
measured out and marked the end points (26 inches apart) as well as
the center mark (at 13 inches). Then, I drilled a pilot hole at both
of the end points and installed my eye screws. Don’t worry about
how far in they are at the moment, just screw them in until they are
solid. Above the center point I now installed a ¾ inch thick piece
of scrap wood that will give me something to clamp my caliper to. Now
run an arrow shaft through your eye screws (obviously, you will need
them to be oriented so that the holes face each other….) and clamp
your calipers to the scrap board above the center mark and bring it
down until it touches the shaft. Does it hit it exactly on the
center? If not, screw your eye screws in or out as needed until the
tip of the caliper hits the center of your arrow shaft.
Using Your Spine
Tester
Using the spine tester is pretty straightforward. Begin by setting your caliper (if you have a digital version like mine) mode to decimal inches. Then insert an arrow shaft into the two eye screws that mark your end points and orient it so that the grain on your arrow shafts is going vertically. Now, slowly bring the tip of your caliper down until it lightly touches the arrow shaft, then zero it out. Attach your weight as close to the center as you can and let it hang freely. Carefully extend the caliper until it just barely contacts the shaft and read the deflection amount. From here, your arrow spine = 26 / deflection. . . Or, you could go the simple route and just look at the spine chart I have posted at the bottom of this page. No sense in doing the math for each shaft, just get your deflection amount and compare it to the chart. Actually, in the long run I would like to make one that’s a little fancier and has a dial/pointer that simply tells arrow spine in 5# increments. That way I wouldn’t even have to look at the chart. Maybe in the future when I have time to think about it. For the time being however, as a $3 last minute way of double checking my shafts to select ones that match, I’m pretty happy with what I’ve got!
Here is the spine chart as promised. As you can see from my picture above, I had a deflection of 0.56 inches and when we look at the chart that corresponds to about a 47# spine (ie for a bow with a 47# draw weight).